Connect Power
Connecting AC Adapter
1) Connect the AC cable to the AC adapter.
2) Plug the DC plug of the AC adapter to the power connector of the printer.
3)Plug the AC plug of the AC cable to an outlet.
Note:
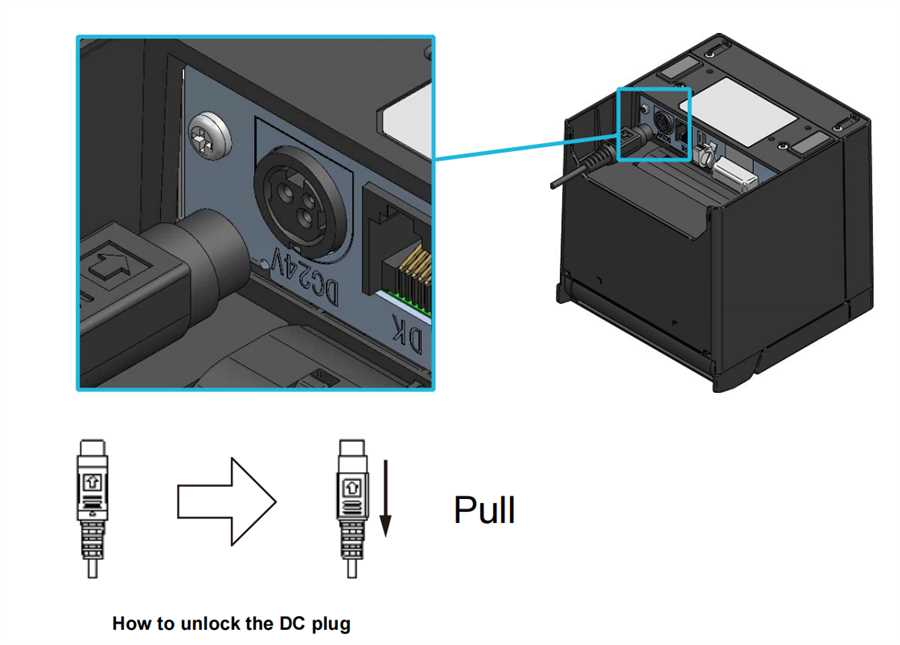
◆ Plug the DC plug into the power connector of the printer in the correct orientation. When plug the DC plug forcibly in wrong orientation, it may cause damage.
◆ Unplug the AC plug of the AC cable from the outlet when inserting or pulling out the DC plug.
◆ The printer power connector has the locking system.
Pull the DC plug to the opposite direction of the arrow shown in the front side of the DC plug to unlock.
Unlock the DC plug as shown in the figure before disconnecting it.
◆ When the printer is not used for a long time, unplug the AC plug of the AC cable from the outlet.
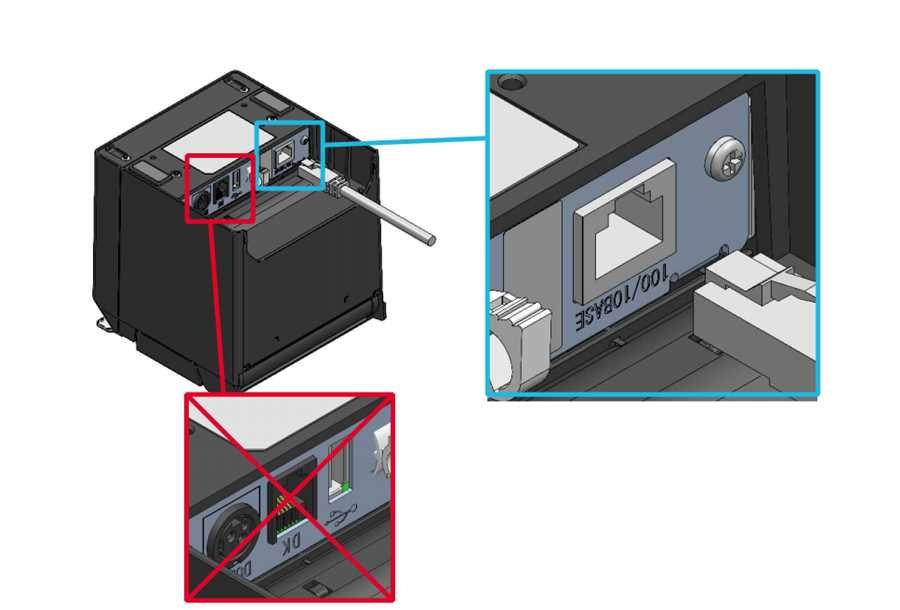
Connect Network Cable
Connect the printer to you network by joining ethernet cable to the back of the printer in the ethernet cable slot.
Loading Paper Roll
Follow the instructions below to load the thermal paper into the printer :
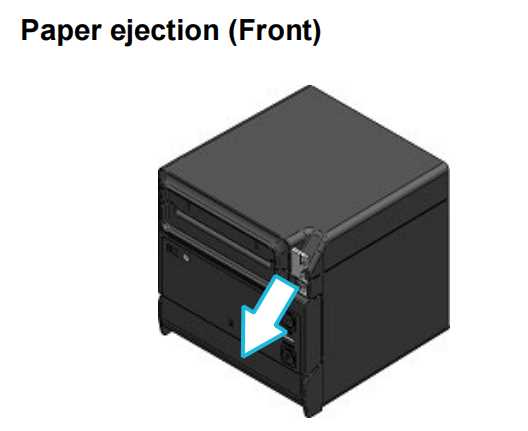
1)Operate the release lever in the direction of the arrow shown in Figure to open the paper cover.
2)Take one end of the thermal paper
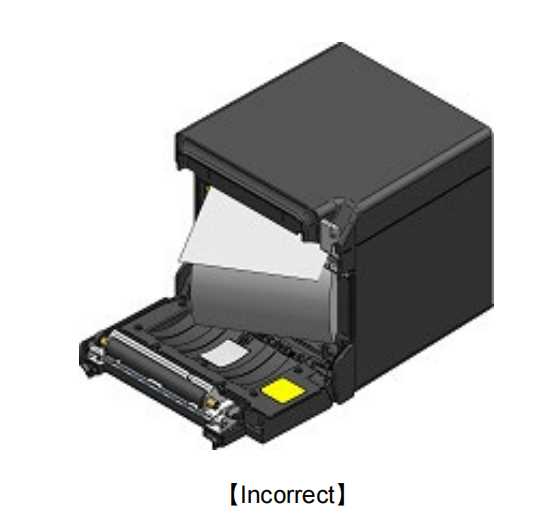
3)Load the thermal paper into the paper holder.The paper should be loaded in the figure below.

4)Pull the thermal paper straight.Make sure that the thermal paper does not slant.

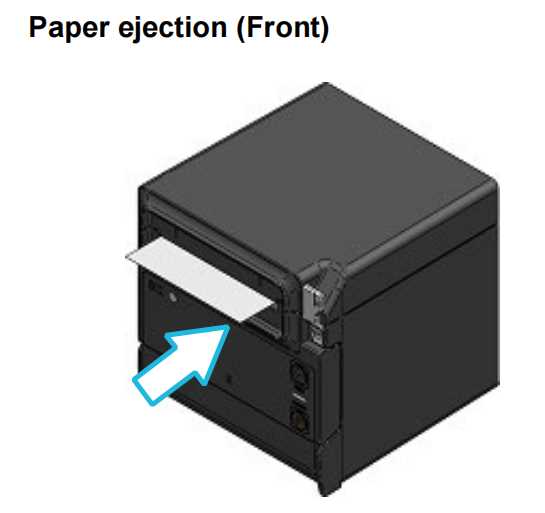
5)Push firmly the part indicated by the arrow in figure to close the paper cover to avoid one side lock defect.After closing the paper cover,paper feed and paper cutting are performed automatically.
Note:
DO NOT use the thermal paper whose end is glued, taped or folded
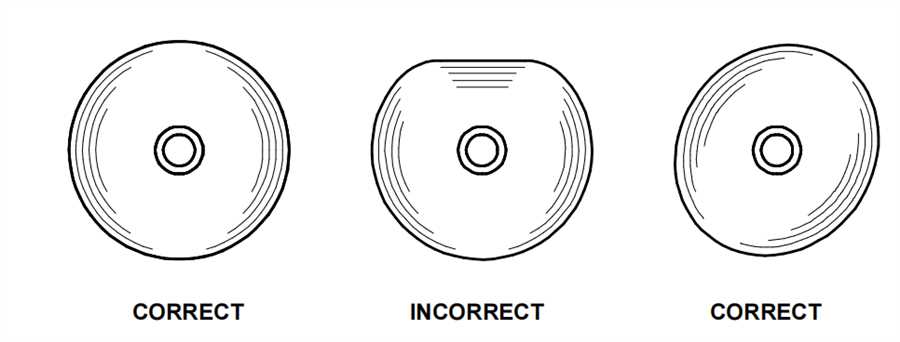
DO NOT use deformed thermal paper. Doing so may cause the printer damaged.
In the case of using loosened thermal paper roll, rewind the roll before using it.
Get IP address of the printer
The printer can perform a test print. In the test print, such as the firmware version and setting values of function settings are printed.
1)Install the thermal paper in the printer as instructed above.Ensure that no error occurs, and then turn off the printer.
2)Hold the FEED Switch down and press the POWER Switch, then release the POWER Switch.Release the FEED Switch when the test print has been started.
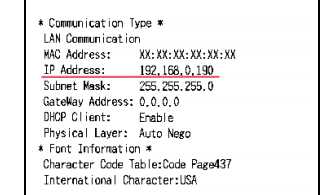
3)The printer cuts the paper and returns to the print-ready status when the test print has completed, and ip address of the printer is inside the Communication Type section at the bottom section of the slip.
Login POS App
Open the POS app in you device and login

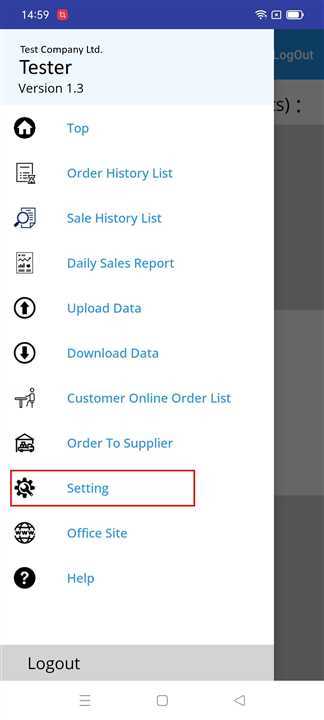
Go to Setting
Slide from the left edge of your device to open the side bar or just click on button on top left of the app to get the sidebar
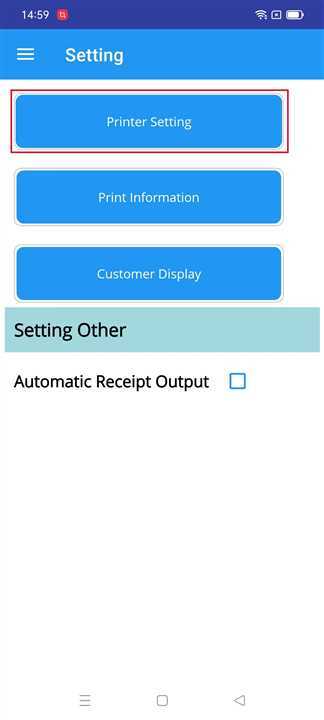
Open Printer Setting
Click on Printer Setting button when the setting page is shown.
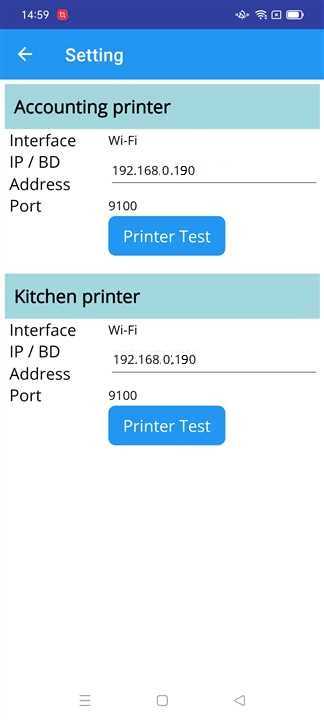
Set IP Address
When the printer setting page appears, a list of printers that are setup for your shop is shown.Fill in the IP address box with the ip address of the printer you want and click on the Printer Test button.
Note : The ip address of the printer and the entered ip address must be same.
IP Setting Complete
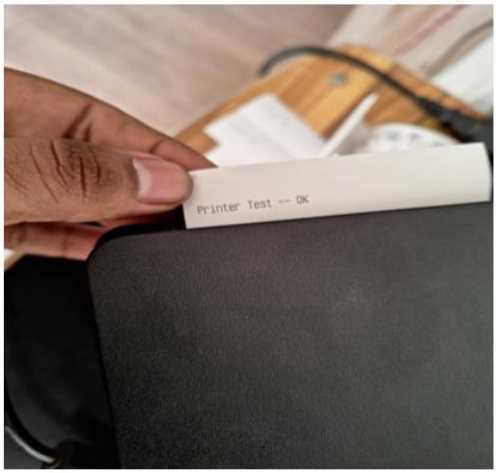
After clicking test, a slip of paper is ejected by the printer with message "Printer Rest --OK".This message indicates that the printer is ready for use for your shop.