Get IP Address of the printer
The printer can perform a test print.In the test print,such as the firmware version values of function settings are printed
1)Install the thermal paper in the printer.Ensure that no error occurs,and then turn of printer.
2)Hold the FEED Switch down and press the POWER Switch,then release the POWER Switch.Release the FEED Switch when the test print has been started.
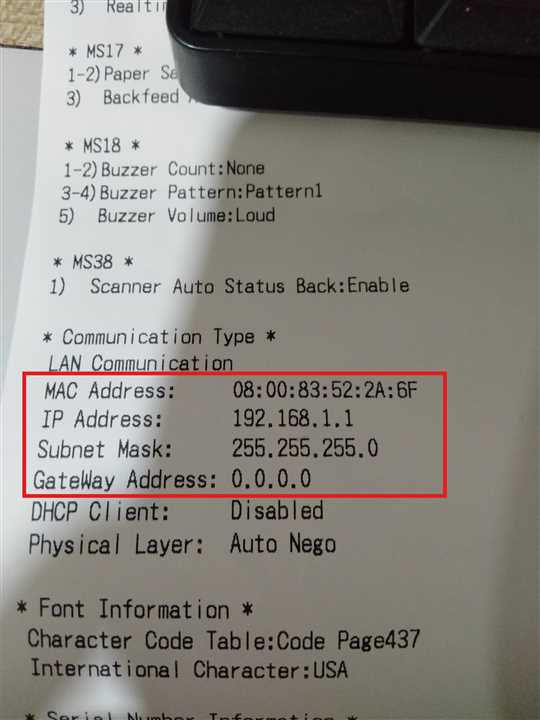
3)The printer cuts the paper and returns to the print-ready status when the test print has completed, and ip address of the printer is inside the communication Type section at the bottom section of the slip.
Check For Dynamic IP
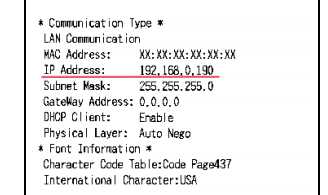
When IP mode is dynamic, the IP address of the printer may change.Check the slip if the printer IP is dynamic or static.Refer to the slip id DHCP is enabled or disabled in "Communication Type " Section on DHCP Client.

Go to Printer Setting Page
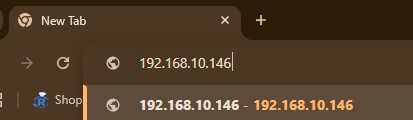
Get the printer IP from the slip and enter it into the address bar of browser in your phone or pc.The printer setting page appears with their information.
Configure Printer
After entering the IP address printer configuration page opens up where user can change IP address of the printer or put DHCP client Disabled or Enabled

User can put custom inforamtion like ip address, subnet mask and gateaway address.User can also enable and disable DHCP client.After then press apply to apply these settings.
NOTE:It is recommended that only DHCP client to be disabled as no change in any other information should be done like IP address,Subnet Mask and gateaway address
After pressing apply a page opens up which gives out necessary information.

Get the new IP of Printer
Get the IP slip from thr printer and check the ip we just fixed to the printer.Refer to the image,as you can see now it has been changed from DHCP to Fixed and DHCP is disabled.