Logo
  • Getting Started
  • Categories
    • Initial Setting
    • Registration
    • Expenses
    • Sale
    • Order
    • Daily Closing
    • Accounting
    • COO (Customer Online Order)
    • CTO (Customer Tablet Order)
    • Printer
    • Monthly Closing
    • Other Uploads
    • Customer Display
    • Seats Settings
    • Features of POS App
  • Contact Us
  • English jpnflg
    engflg English engflg 日本語 engflg नेपाली
  1. Categories
  2. COO (Customer Online Order)
  3. COO Menu and Category
  4. How to add COO menu

How to add COO menu


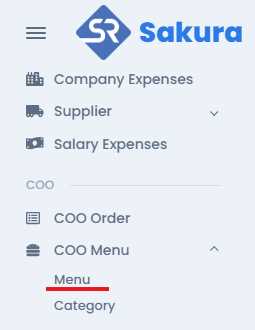
Opening COO menu list

You will find menu at left side in COO Menu tab in COO section. Click on menu, then you will find the COO menu list with registered COO menu with their information.

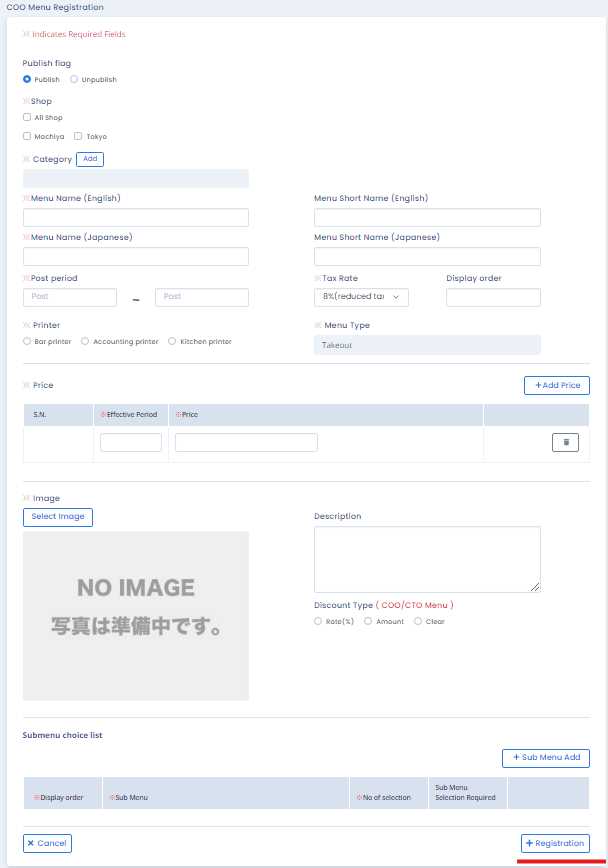
Click register button

To open registration form and registration button should be clicked.
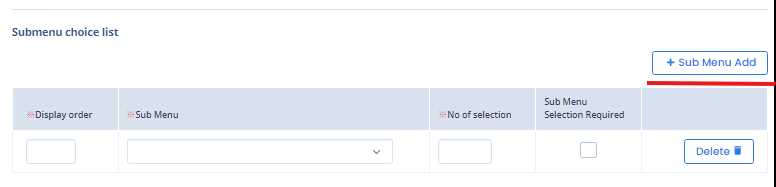
Add sub menu

Registration forms opens up where information is filled up by user. Additionally, sub menu can also be added as shown in the figure above.

Click Registration button

Finally, after all the information filled up registration button is clicked register COO menu.

Categories
Initial Setting
Registration
Expenses
Sale
Order
Daily Closing
Accounting
COO (Customer Online Order)
CTO (Customer Tablet Order)
Printer
Monthly Closing
Other Uploads
Customer Display
Seats Settings
Features of POS App
FAQ

Namaste International LLC

ナマステ・インターナショナル合同会社

Products
  • POS (Point On Sale)
    • Sakura POS
    • Sakura Reji
    • Himal POS
  • Order Management System
  • CTO (Customer Table Order)
  • Ryoriten (Customer Online Order)
Information
  • FAQ
  • Getting Started
  • Inquiry
  • Privacy Policy
Contact Us
  • 2-21-22 Machiya, Arakawa-ku, Tokyo 116-0001
  • (+81) 080 4080 2044
  • jpnflg English
    engflg English engflg 日本語 engflg नेपाली
© 2025 Namaste International LLC. All Right Reserved.
×