Step to Register the Menu
You will find the Menu at left side in shop Menu tab.
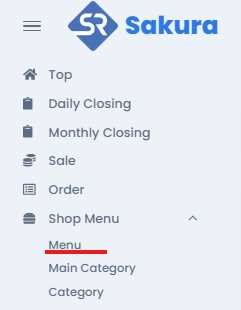
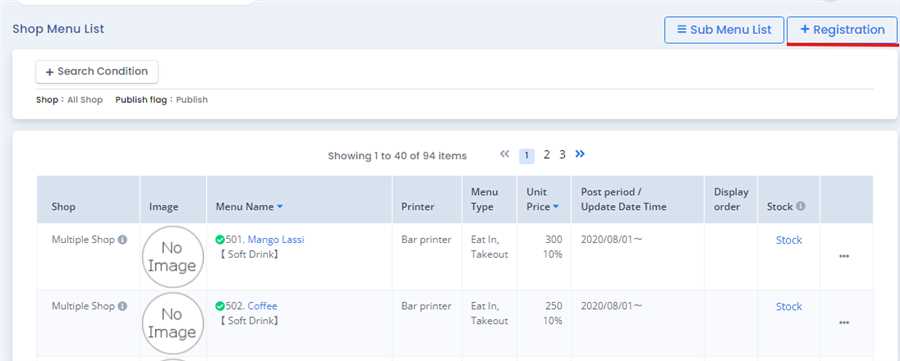
Click on Shop menu and you find the Menu Tab, go through the menu tab, and click on Menu, then you will find the Menu List with registered menu with their information, where you will find the Registration button on the top right.
After pressing Registration button,menu registration form opens up where you can fill up required information like Menu name, price, tax,sub menu, image etc and press Registration button to register the Menu.
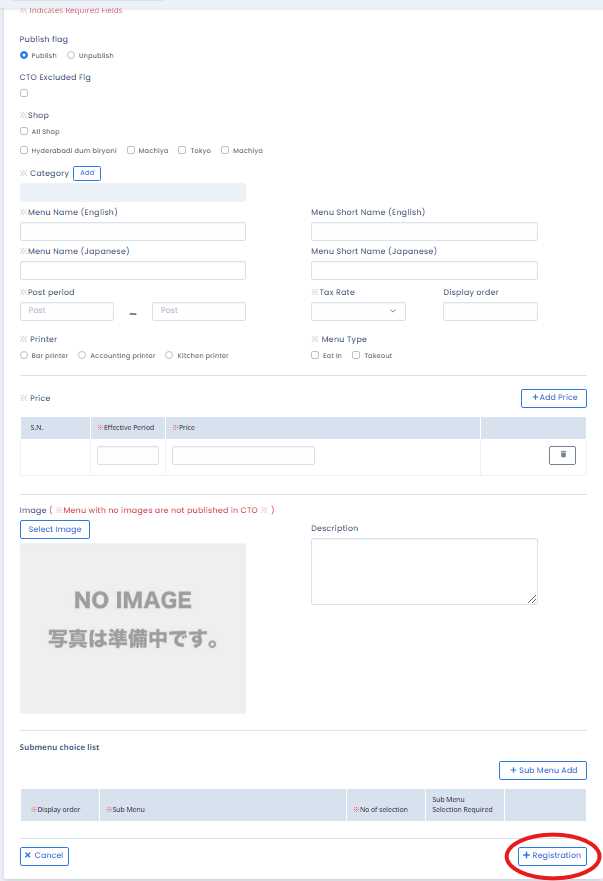
Note: Red astreix mean the required field in necessary and must me filled and must not be left empty or blank.
Aflter filling up the form with required information and pressing Registration button a dialogue box appers to confirm the registration, if confirmed Registration of the menu is complete.
CTO Excluded Flag: (Applicable only for the User who has CTO site accessible ) This checkbox is checked for the menu that, you dont want to make this menu visible in the CTO (Customer Table Order) site. By default this menu is allowed.
Shop: This is used to select the shop in which you want to display your menu.
Category: To add Category, there is an Add button where you will see the Different category that you have already added as shown below:
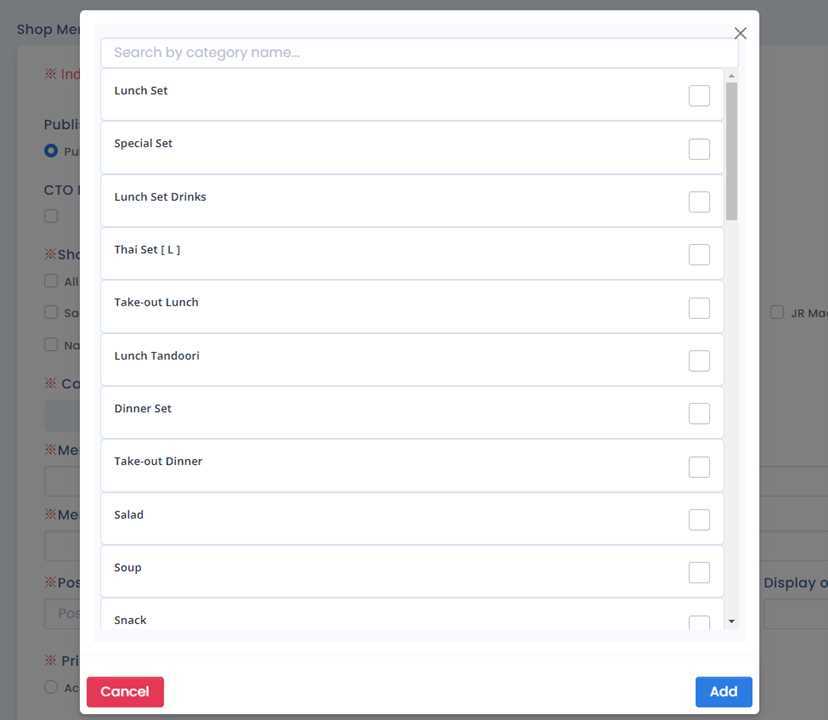
Select the categories according to your menu needs and Click on Add button to save it. On doing that the category will visible in category field of menu registartion form. This produce will add Categories of the menu
Menu Name (English): This field contain the name of a menu in English language which is also a required field. There is another field with it name as Menu Short Name (English), in which short name for that menu is entered. The Menu Short Name (English) is optional. Note: You can customize Menu name as you want to display the original name or the Menu Short Name.
Menu Name (Japanese): This field contain the name of a menu in Japanese language which is also a required field. There is another field with it name as Menu Short Name (Japanese), in which short name for that menu is entered. The Menu Short Name (Japanese) is optional. Note: You can customize Menu name as you want to display the original name or the Menu Short Name.
Post Period: Post Period is that kind of field in which the Date are entered in which that Date determine the effective time of that menu in the selected shop. In another way, You need to enter the Post period to display your menu from the time you entered to the time you have entered. During the entered time period that menu will be effective in the shop.
Tax Rate: Tax Rate is a dropdown field in which the Tax rates are visible in that dropdown, which is need to be selected according to the menu you are creating. Note: Only the tax rate that has been added while creating the shop and company are shown in this dropdown.
There is another field named as Display order which is used to display your menu according to your order that you have been entered. foreg: if the display order of menu_1 is 1 and Display order of Menu_2 is 2 then the menu in menulist will be displayed according to that number in ascending order. This field is also called as sorting the menus. Note: if you create the menu with the display order empty then the menus in menulist will be displayed according to the created menus with their respective shop.
Printer: While creating the menu you need to choose the type of printer you are using in your shop. Foreg: kitchen printer, Accounting printer, Bar printer etc. These type or option of printer will be shown after the adding from the agent site of that respective shop.
Menu Type: This field is use to identify your menu type. Either your can chose the Eat in menu that mean the menu can be only available for Eat inside that shop or resturant or you can Choose takeout menu that means the menu is availabe only for the takeout option. You can select both for such type of menu that can be available for Eat inside restaurant or takeout.
Note: Moslty the menu in which Menu type is Eat In, then these type of menu are not visible in Ryoriten site only the takeout menus are visible in Ryoriten site. Similary the menu that has ticked only on the Takeout option are shown in Ryoriten but not be visible in the resturant app POS or CTO.
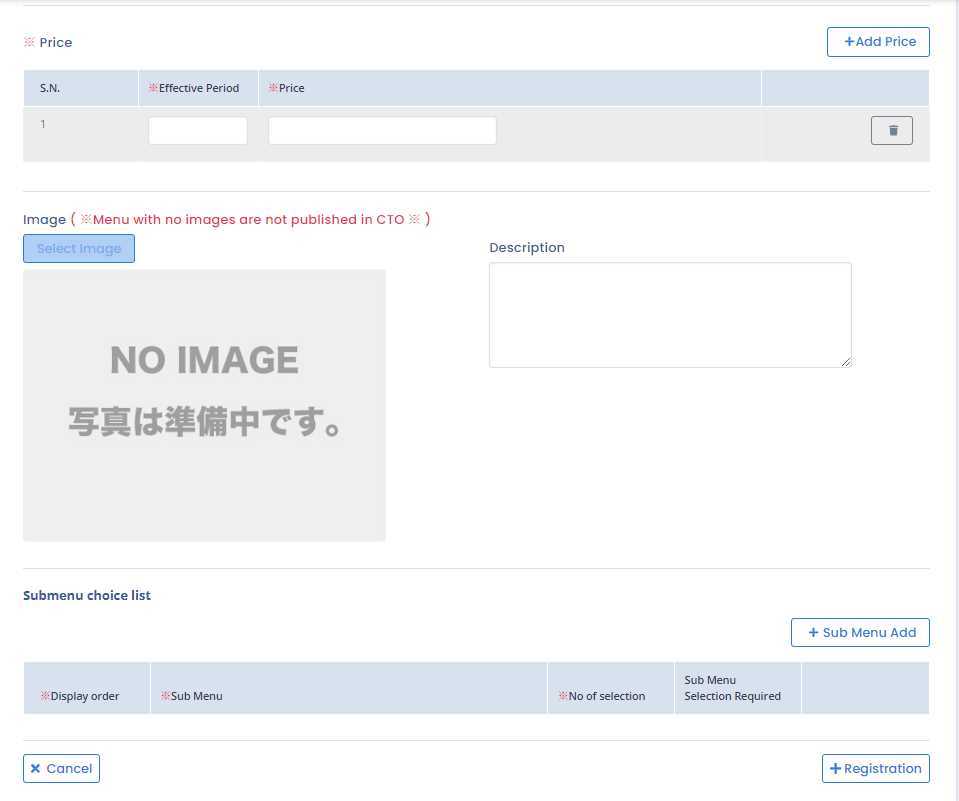
Price: The Price Section is used to enter the Price of that menu you are creating. There is facility of making the menu price different for the different period of time. You can set price of some amount till the date that you selected at effective period. Then you can Add price for other period of time with another amount of money. You can add multiple price for the different set of time period. as shown in below figure:
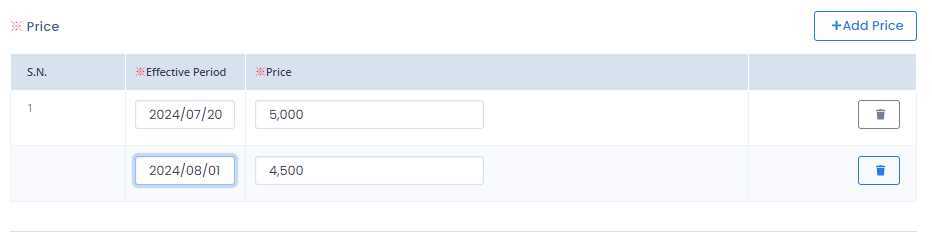
lets take an example of this price and time period, the price of that menu will be 5,000 from the 2024/07/20 to 2024/08/01 and after 08/01 the menu price will be 4,500 till the date of post period.
Image: The image of the menu are Clicked and uploaded from this field to show the image of that menu while displaying in different site or app (POS app, Ryoriten site, CTO ). To upload the Image there are follwing steps.
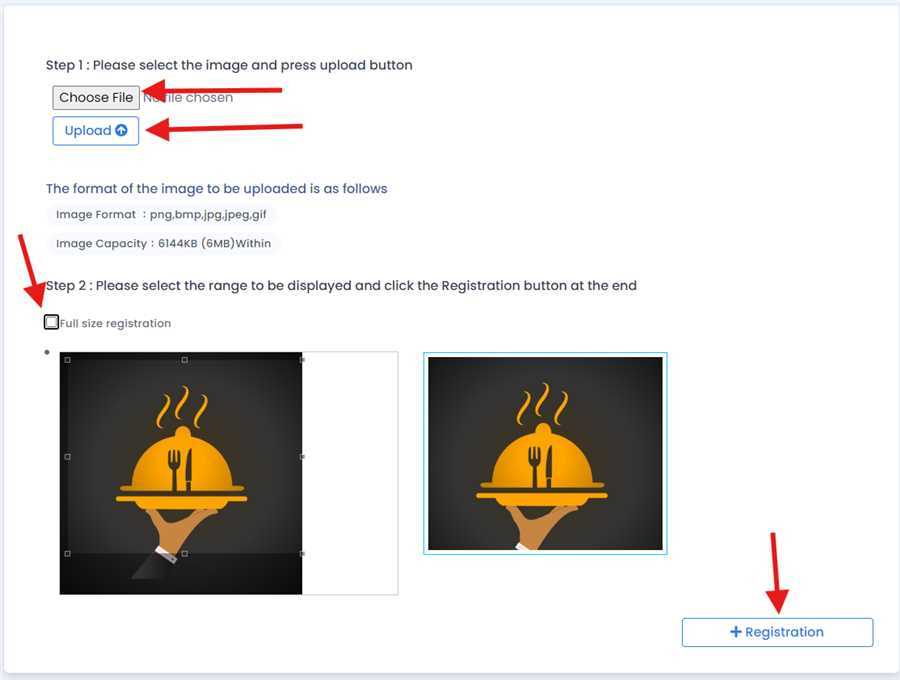
- Firstly Click on the Select image button in the form, after this the dialog box will be opened which is as shown in figure above.
- Then Click on Choose File to choose a image you want to upload, this is done by browsing the image from your device.
- After choosing image Click on Upload button, on doing this the choosed image will be displayed below.
- Tick the Full size registration or you can crop your image as your wish.
- After this Click on Registration Button while doing this the menu image for that menu is regisatered and Displayed in the form.
There is a field name called as Description where the description of the menu are entered. This description will be shown below the name and image of the menu in CTO and Ryoriten. Detail Description of menu like its ingrendients or composition of the menu are specified in this section. This is an optional field.
Submenu Choice List: If your menu contains submenu then you need to add a Submenu list according to the menu. There is a table which shows display order, Submenu Name, No of Selection and Sub menu selection Required. To add submenu follow the following steps:
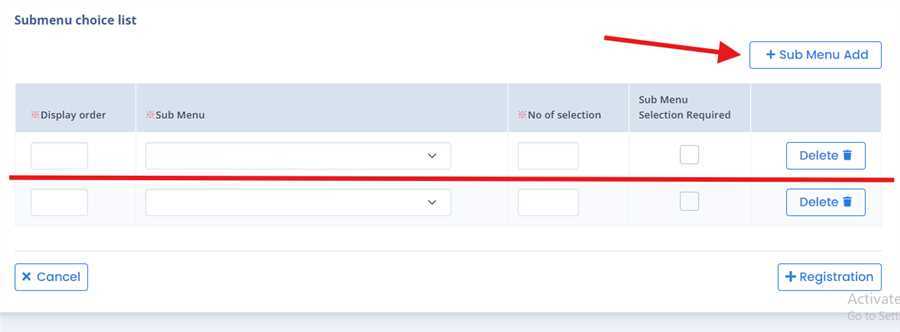
- First click on the Sub menu Add Buton where you will get a one row in that Submenu list table then according to your menu needs.
- Enter the display order and can Select the Submenu Name that will be shown in dropdown.Here the Already Created Submenu will be Displayed in this Drop Down and Select according to your menu.
- Enter the No of selection option, in this you can enter the how many submenu details are you making to choose in a Submenu.
- Check the Sub menu Selection Required field. if you want to make submenu slection is required then checked in this field other wise you can make it optional.
By entering the required fields you simply can Click the Registration button in menu registartion form to register the menu. By this process/ procedure you can simply make an entry of a Menu in the POS system.