How to Set Static IP Address to your Printer(CITIZEN Model:CT-257)
Get IP Address of the Printer
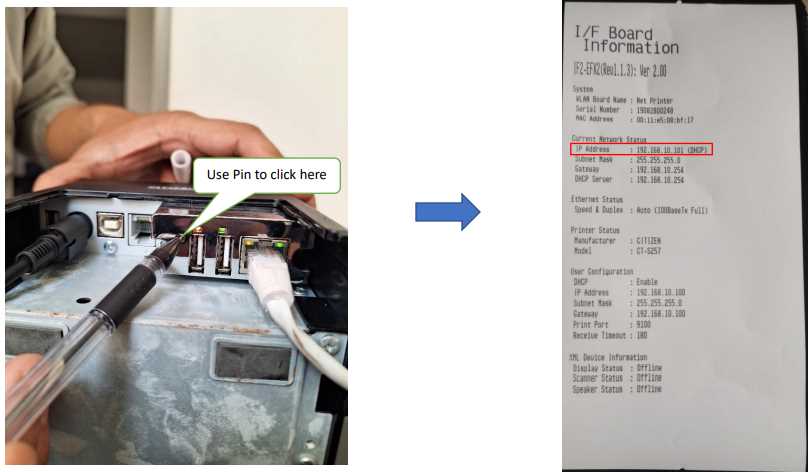
As shown in image, get the slip with printer network details by pressing the button. The highlighted part is IP address of printer in your network. *WARNING *: Please click the button behind the printer only once. Do not hold click it for long. It will reset printer setting.
Check for Dynamic IP
When IP mode is dynamic, the IP address of the printer may change. Check the slip if the printer IP is dynamic or static. Refer to the image to see if DHCP mode is enabled.

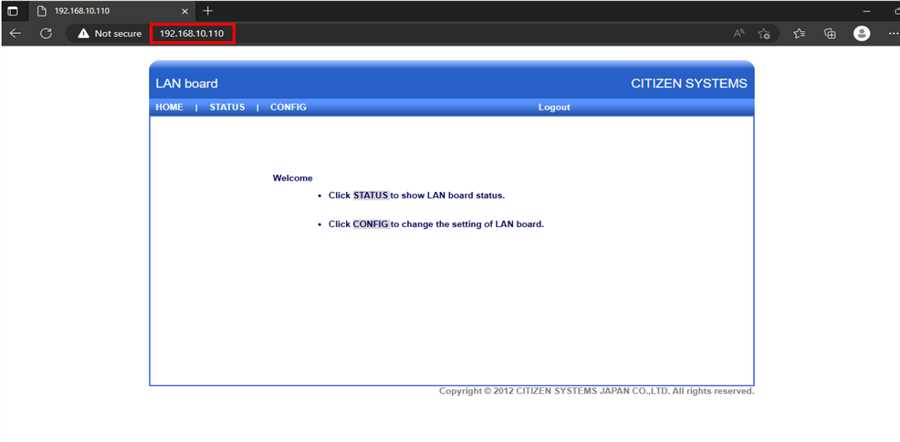
Goto Printer Setting Page
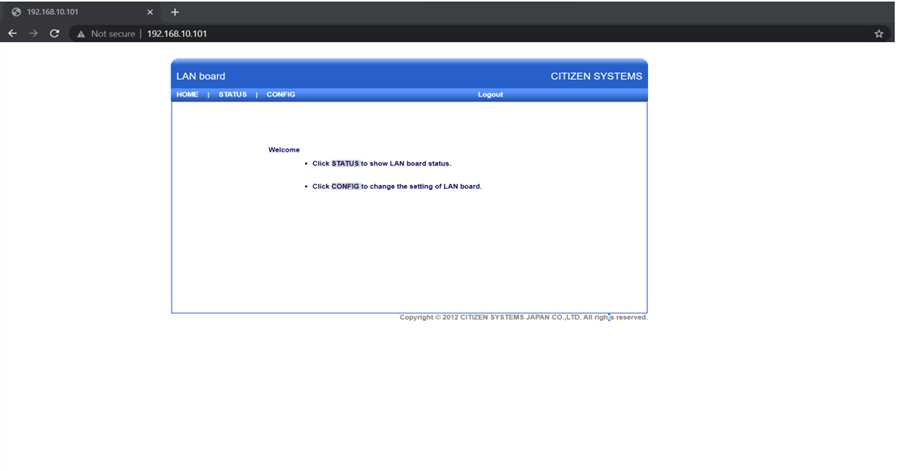
Get the printer IP from the slip and enter it into the address bar of browser in your phone or PC. The printer setting page appears.
Configure Printer
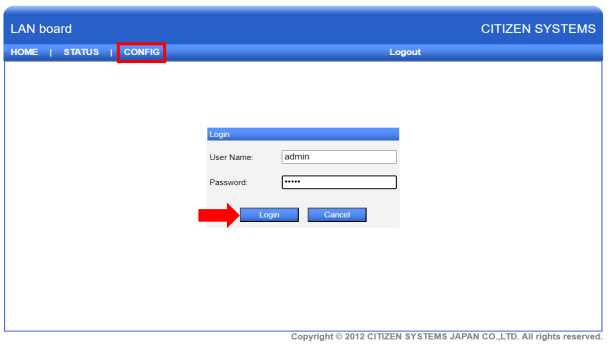
When printer setting page appears, click on CONFIG tab. A login page appears. Enter default credentials [Username: admin / Password: admin] and press Login button.
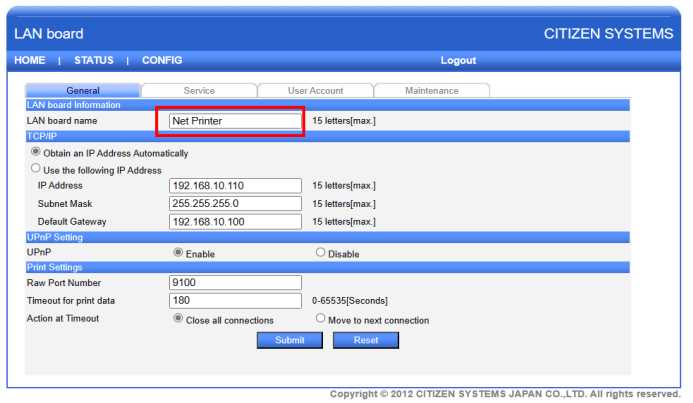
Assign static IP to Printer
A page of settings of printer appears after login. Refer to the image attached and rename the printer as per you need. Name the printer just like in POS app for convenience.
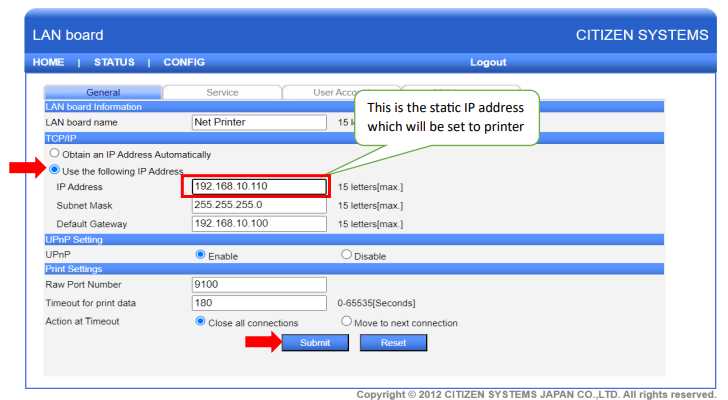
Set Static IP Address
Under TCP/IP tab, click on "Use the following IP Address" option. Based on default gateway, set IP for you printer. For eg: in case of attached image, gateway is 192.168.10.100 so the IP range to set to printer is (192.168.10.101 to 192.168.10.149) . Likewise, if gateway is 192.168.1.10 then IP range is (192.168.1.11 to 192.168.1.49). After typing in the IP address click on 'Submit' button.
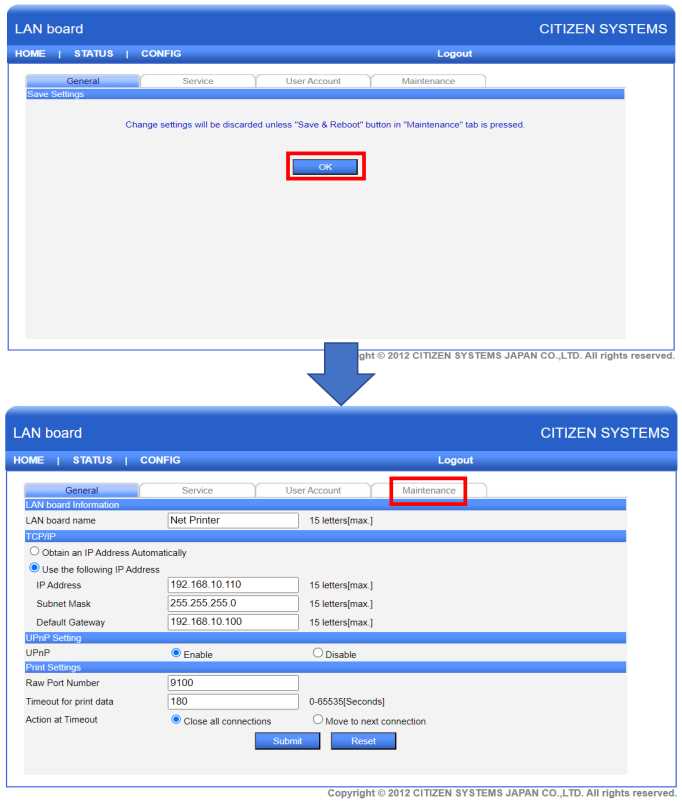
Saving the IP information
After clicking on submit, another page appears with instructions to save the information we just registered. Click on 'OK' button and the click on 'Maintenance' tab as shown in the image.
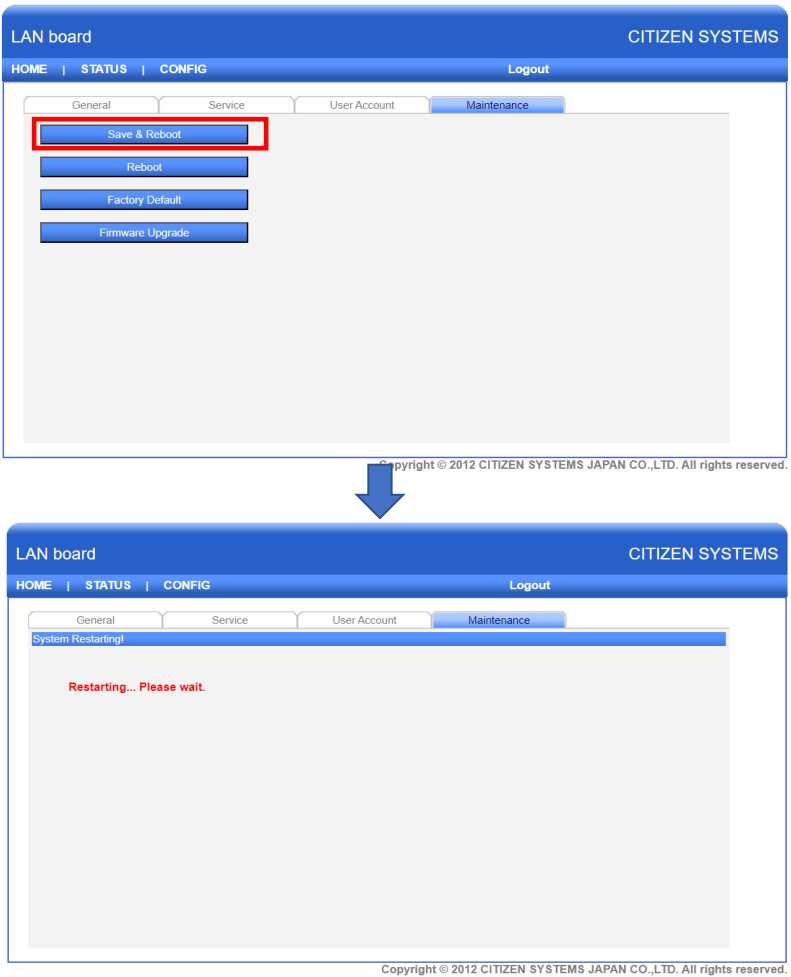
Save Config and Reboot
On appearing of Maintenance tab, click on 'Save & Reboot' button. The printer will restart with new configuration done in above steps.
Verify the IP settings
Goto the IP address we just assigned to the printer. Put the IP on the address bar of browser. If the printer page appears then IP has been successfully assigned to printer.
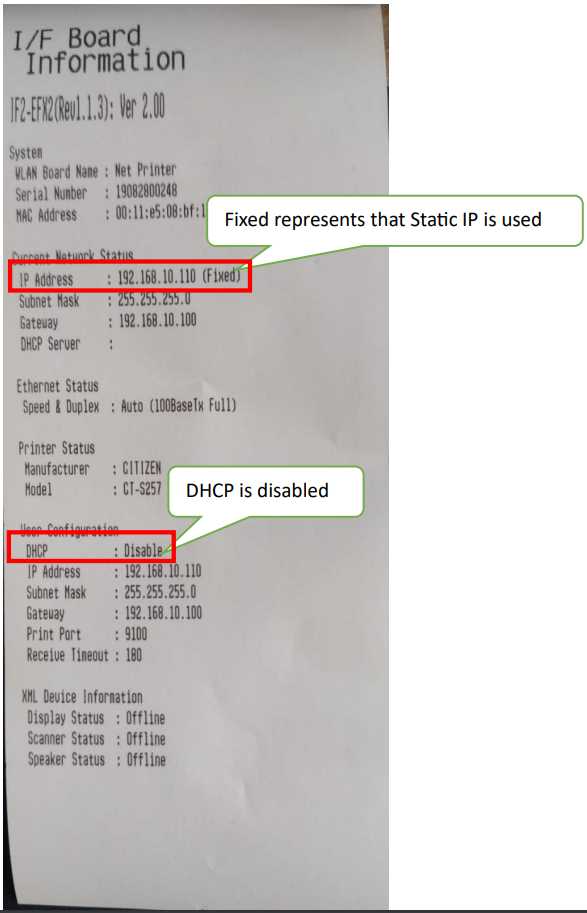
Get the new IP of Printer
Get the IP slip from the printer and check for the IP we just fixed to the printer. Refer to image, as you can see now it has been changed from DHCP to Fixed and DHCP is disabled. Congratulations, you have successfully set static IP address to your printer.